Fashion Boutique Birthday Card

C9 Window Shop Pop Up and Fashion Shoppe dies

I am a huge fan of creating scene cards using dies. It’s one of my favorite types of cards to create. For this week’s card share, I created a Fashion Boutique Birthday Card for my chic sister, Cathy. The set, Concord and 9th’s Fashion Shoppe, contains so many different types of accessories, that you do not need the Window Shoppe Pop Up dies to use the Fashion Shoppe dies. You can create a card just using the accessories. How cute would a line of rainbow purses be!

YouTube video for this card can be found here: https://youtu.be/Kahmx_0NbtU

All of the items in the shop are cut from scraps of card stock. I used some Burnished Rose from Tonic Studios for all of the Rose Gold items (string of lights, accents on hat and dress) and the gold was from Tonic Studios as well (mannequin, purse straps and purse decor). The Mirror is from Tonic Studios Rainbow Reflective Card Stock. If you look at it straight on, it looks like a mirror. But if you view it from any other angle, it looks like a rainbow.

The awning was made from old, Heidi Swapp Toner Sheets. The sheet was 12×12 and I cut it down and foiled it with Rose Gold Foil from Minc on my Minc machine. It worked beautifully. The lights attached to the awning are cut from rose gold and glitter white card stock scraps.

The door, building accents and the inside of the boutique are from C9 card stock. I used Grapefruit and Aqua Sky. These colors together are fabulous!

The remaining items were cut from white card stock scraps and colored with my Copic markers. I used E 59 and E25 for the browns, R 32 for the coral dress and the blouse with the patterned skirt. The patterned skirt was cut out of scraps from Willow and Sage papers by Bo Bunny.

I assembled the card and added the birthday greeting on the interior.

Thank you so much for stopping by! I appreciate you!

Patty

Easily Elevating the Look of Your Stamp and Stencil Sets Featuring Pink Fresh Studio Lantern Botanicals

To create today’s card share, I used a stamp set that literally had me saying OMG as soon as I saw it. It’s Pink Fresh Studio’s Lantern Botanicals. It is such a gorgeous design! It can be a sweet, sophisticated or fantasy/whimsical set. It is just a brilliant design.

Watch how I created this card on YouTube. Https://youtu.becUHdAfeE2HA

Pink Fresh Studio Lantern Botanicals

To start, I stamped the image on Xpress It card stock with Momento Tuxedo Black ink. I flipped the card stock over and stamped the florals again. I left the stamp in my Misti stamping tool and stamped an additional card panel with the floral stamps. It is exactly the same as the first card panel I stamped.

I took the co-ordinating stencil and stenciled in the images using Altenew Fresh Dye inks. The pink is Dusty Pink. I accented some of the pink flowers with Coral Red. The lantern and the buds were stenciled with Cherry Sweet. The leaves were stenciled with Berry Cool and Lettuce Celebrate Fresh Dye Inks. I stenciled both card panels the exact same way.

On one card panel, I stamped the lantern and then the candle in the lantern. To give the florals and leaves an elevated look and a little more depth, I colored the base of most of them with Prisma Colored Pencils. I used Carmine Red and Crimson Red on the florals and berries. I used Kelly Green and Kelp Green on the leaves and Yellow Orange on the flame. I used Lemon Yellow to create the glow around the flame in the lantern. I used white to blend the colors together.

I outlined the entire image with Copic Marker B00 and then blended out the outline and colored the background with Copic Marker B000. This makes the images pop and elevated the look. I cut the oval out using Catherine Pooler’s Around the Loop Nested Dies. I used the largest die and the third largest die to get the size oval I wanted. I cut out three more loops using really thin card-stock. I glued those together then glued the stamp and colored oval on top of the three ovals. It is a slight bit of dimension, I used 65lb card stock so the dimension is minimal. But the contrast of the white against the blue helps add to the design.

I stamped the sentiment in VersaFine Black Ink and used Hero Arts Black Fine Detail Embossing Powder on a scrap piece of vellum. I cut the sentiment out using Simon Says Stamps Nested Banner Dies.

To finish the card, I used Hero Arts Red Ombré Sequins and Catherine Poolers Tybee Island Sequins. I used Glossy Accents on the lantern and Wink of Stella on all of the flowers.

Thank you so much for stopping by! I hope you have a fabulous week!

Patty

Wild and Free Flowers with old School Background Techniques

Hello all!

Today I created a pair of floral cards using Simon Says Stamp Wild and Free Florals and supplies I haven’t touched in over a year. My goal is to use everything this year. So far, I have used alcohol inks, old stitching dies, old Valentines products, Pastes and some dies I have had but never used. This week, I brought out my Zig Clean Color Real Brush Markers that haven’t seen the light of day in several years and some die sets that that haven’t been used for several years as well as Gina K’s Masking Magic.

You can watch my YouTube Video here: https://youtu.be/j4FdW9TN_fY

Wild And Free Flowers By Simon Says Stamp/Dies from Waffle Flower Nested Dome
Wild And Free Flowers from Simon Says Stamp/Catherine Pooler Inks

The florals were colored using Zig Clean Color Real Brush Markers. Red Flowers I used Geranium Red, Red and Deep Red. For the Yellow Flowers, I used Light Brown, Brown, Bright Yellow and Yellow. For the leaves, I used Green, May Green and Light Green.

For the background on the dome card, I outlined around the florals and leaves using Deep Blue and Corn Flower Blue Zig Clean Real Brush markers and a water brush. I would leave a dark outline around the illustration, and blend the ink outward. This was a really popular technique at least seven or eight years ago. Some would use gray tones instead of blue tones.

I then cut the image out with the third dome die as well as a dome out of vellum. I cut the topper and the base out of scrap gold card stock. I embossed the background using Simon Says Stamp Blossom Field Embossing Folder (another older product). I cut the sentiment out of scrap white card-stock using SSS Nested Banners. I embossed with Brutus Monroe Gilded Embossing Powder.

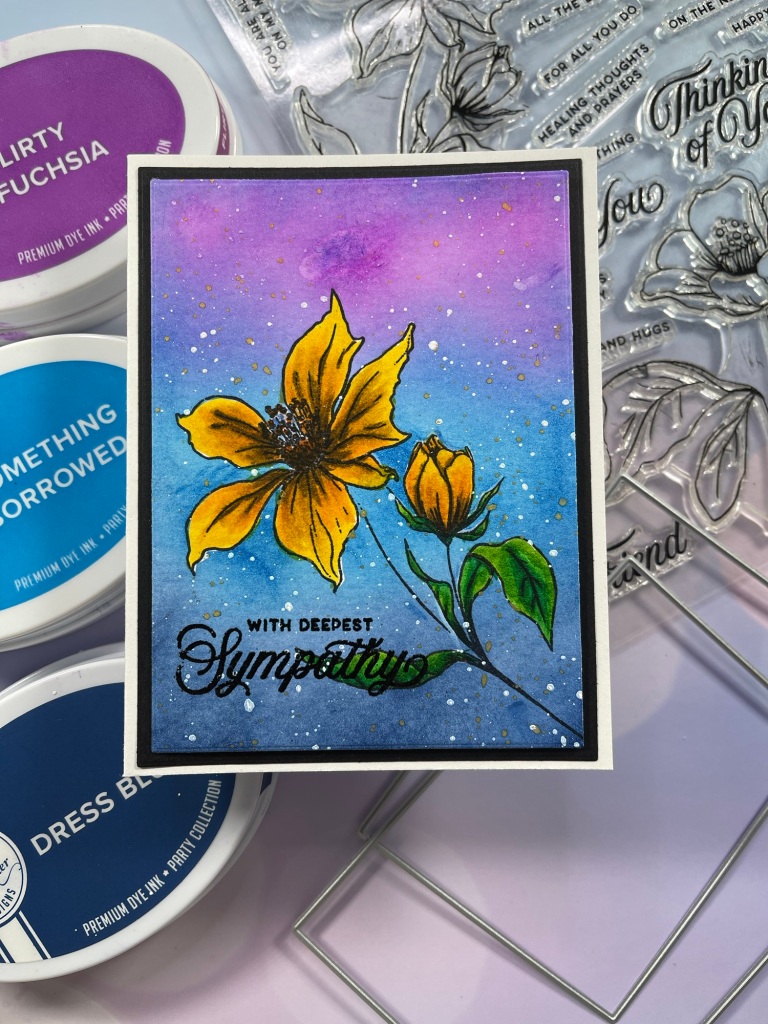
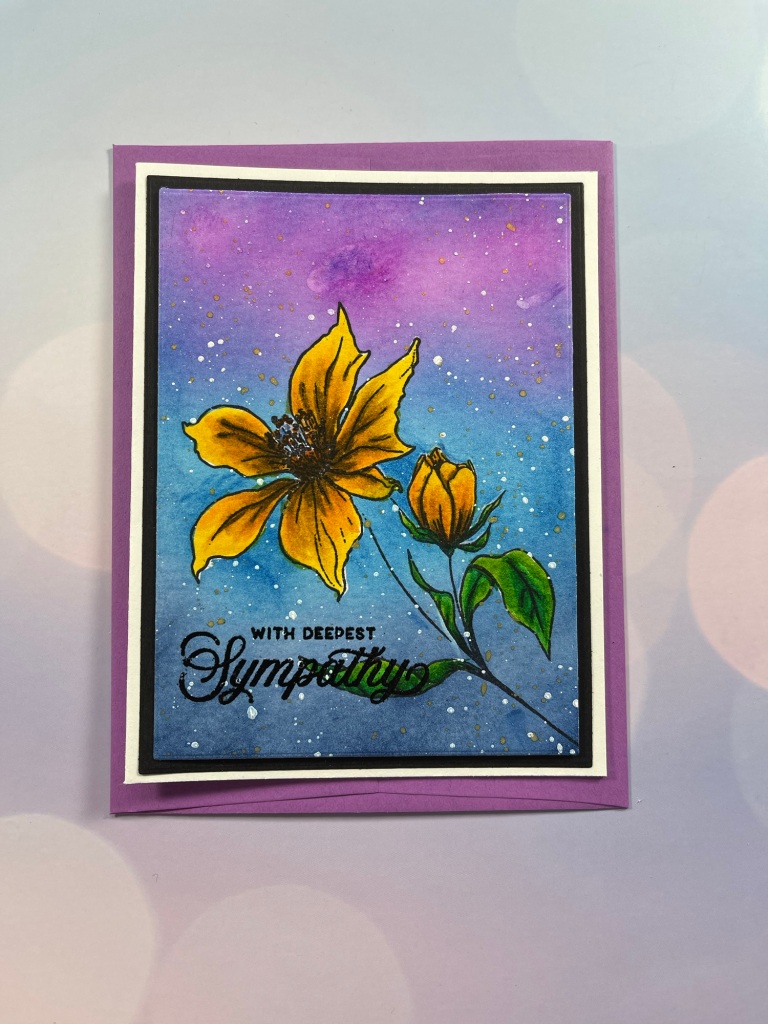
For the background on this card, after coloring, I masked off the flower and leaves using some of Gina K’s Masking Magic. This technique has been around since 2000 or even earlier. You need to make sure everything is dry or the mask won’t stick. I ink blended over the image using Catherine Pooler inks in Flirty Fuchsia, Something Borrowed and Dress Blue. I left the mask on and took some Dr. P.H. Martin Bleed Proof White paint and added a little water to splatter on my card. Splatter has been around since the 1990’s and scrapbooking. It adds so much and is still very popular today.

I then removed the masks and cut the card down using Waffle Flowers A2 Layer dies. I used the fourth die to cut out the floral image and the third die to cut the black layer. I trimmed My card panel a quarter of an inch to create the white border.

I stamped the sentiment using VersaFine Black Ink and Hero Arts Fine Detail Embossing Powder.

Thanks so much for stopping by! Hope to see you soon!

Patt

Custom Alphabet Die Easter Card

I don’t know about you, but I am all into the Spring colors right now. In my clothes, my decor and my card projects.

To watch me create this card on YouTube, click here: https://youtu.be/Dq2CYwckthA

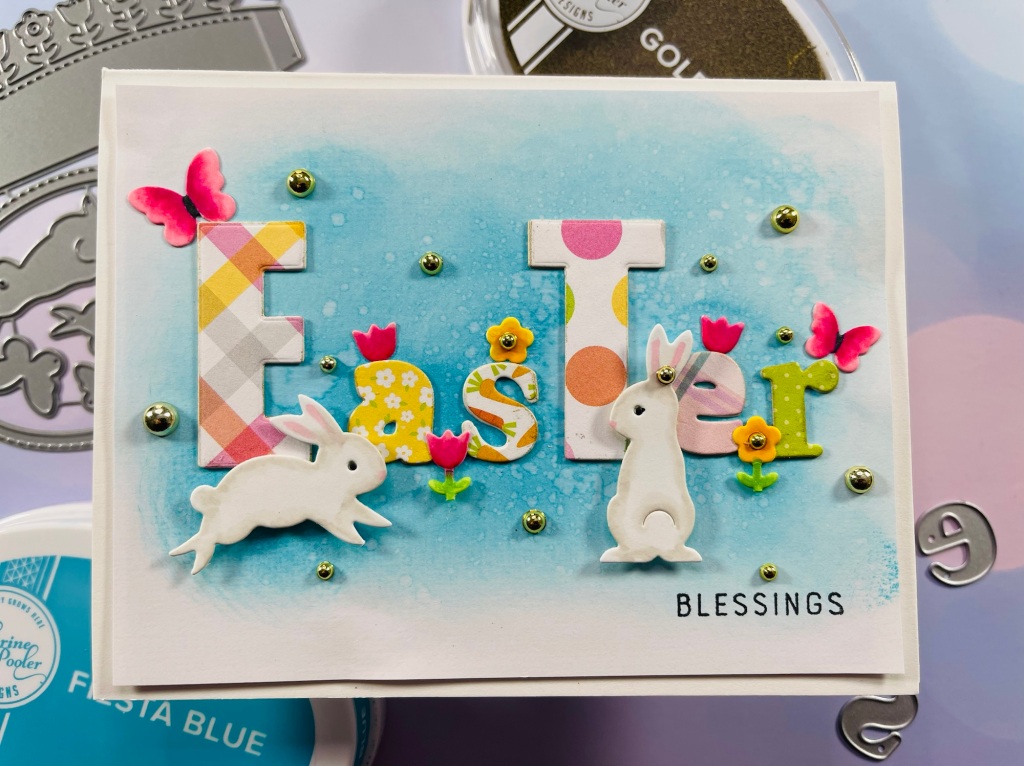
For today’s card, I created an Easter card using three different alpha die sets: Altenew Caps Bold Alphabet die, Lawn Fawn’s Quinn’s ABC’s and Waffle Flowers Retro Outline Alpha die set.

I used pattern paper from Doodle bug to cut out the letters. I also cut the letters out twice from white paper and glued all three layers together to create some dimension. I then took Catherine Pooler’s Metallic Gold ink and went around the edges of the dies to make them stand out a little more against the blue background.

I die cut the embellishments from Lawn Fawn’s Shadow Box Spring Add On die set. I put them on my Misti sticky mat and colored them with Copic Markers. The markers I used are RV 11, RV14, RV21 and RV25 for the pinks. Y17, Y18 and E55 for the yellow flowers. Yg23, Yg25 and G07 for the greens and some W0, W1 and W3 on the bunnies.

I created the background using Catherine Pooler’s Fiesta Blue ink. I spritzed it with water and blotted it off. I stamped Blessings using Memento Tuxedo black ink. The Blessings sentiment is from The Greetery’s Easter Jubilee set.

To finish it off, I added Spellbinders dots in gold. I used 6mm, 4mm and 3mm dots.

Thanks so much for joining me today. Take care and I will see you soon.

Patty

Custom Alphabet Die Easter Card

I don’t know about you, but I am all into the Spring colors right now. In my clothes, my decor and my card projects.

To watch me create this card on YouTube, click here: https://youtu.be/for-U6Sg_k_PY

For today’s card, I created an Easter card using three different alpha die sets: Altenew Caps Bold Alphabet die, Lawn Fawn’s Quinn’s ABC’s and Waffle Flowers Retro Outline Alpha die set.

I used pattern paper from Doodle bug to cut out the letters. I also cut the letters out twice from white paper and glued all three layers together to create some dimension. I then took Catherine Pooler’s Metallic Gold ink and went around the edges of the dies to make them stand out a little more against the blue background.

I die cut the embellishments from Lawn Fawn’s Shadow Box Spring Add On die set. I put them on my Misti sticky mat and colored them with Copic Markers. The markers I used are RV 11, RV14, RV21 and RV25 for the pinks. Y17, Y18 and E55 for the yellow flowers. Yg23, Yg25 and G07 for the greens and some W0, W1 and W3 on the bunnies.

I created the background using Catherine Pooler’s Fiesta Blue ink. I spritzed it with water and blotted it off. I stamped Blessings using Memento Tuxedo black ink. The Blessings sentiment is from The Greetery’s Easter Jubilee set.

To finish it off, I added Spellbinders dots in gold. I used 6mm, 4mm and 3mm dots.

Thanks so much for joining me today. Take care and I will see you soon.

Patty

Easter Egg Craft and Card

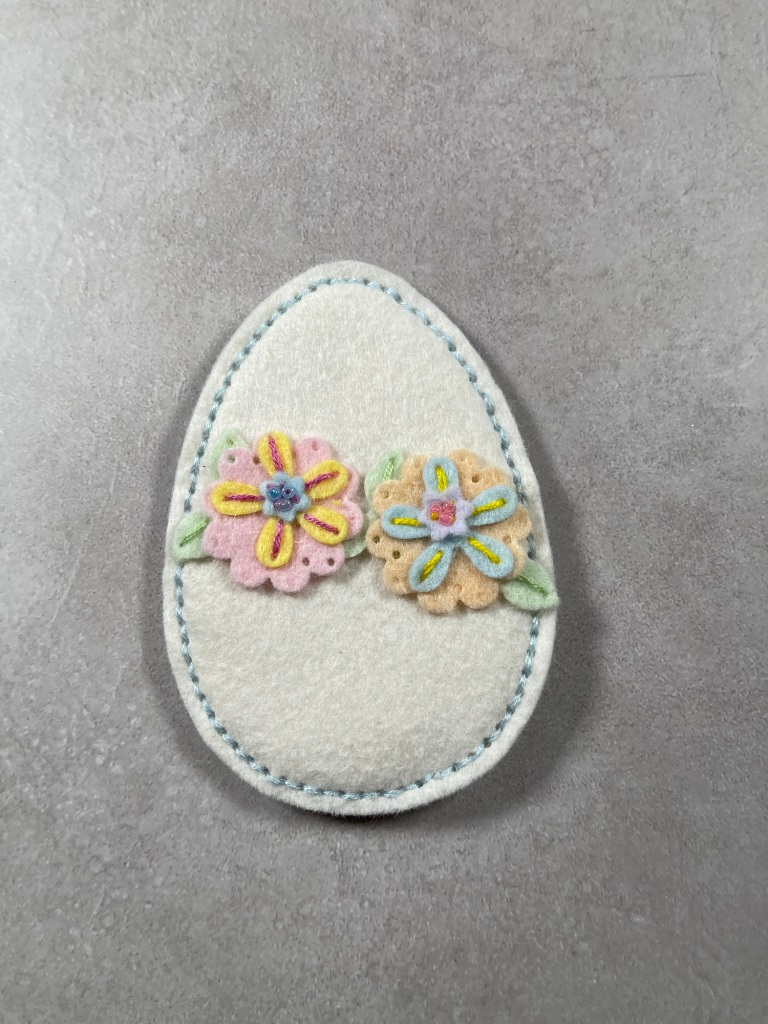
Easter is only three weeks away! Can you believe it?! I have most of my decor out, but I wanted to make a garland for the mantel. I created the eggs for the garland and I liked them so much I decided I will also create a card with a similar look. For the blog, I will just describe the card process. The egg and the card are on my YouTube channel. You can find the video here: https://youtu.be/mGg2uuWsXbk

Benzie Felt and MFT Foliage dies.
MFT Foliage Dies with Lawn Fawn Outside in Easter Egg Stackables

To start, I cut everything out of some scrap white card stock. I colored everything using two colors of Copic Markers per flower part. My peach colors were YR01 and YR 02. Yellow Y00, Y02, Green G40 and YG03, Blue BG000 and B00, Pink RV10 and RV02. I used C00, C1 and C3 for a little shading on the eggs.

I glued everything on to the eggs and then got out my 3mm pearls from Hero Arts. The pearls were white, but you can color them with your alcohol markers to make them match your design. I glues the pearls on my flowers and then created my background.

For the background, I used Distress Oxide in Tumbled Glass. I did a heavier blend in the middle and lighter as I went out. I added one splatters using Distress Oxide in Peacock feathers mixed with a little water and Perfect Pearls to add shimmer. It worked great. I then added Gem Pink from Gansai Tambi watercolors for a little contrast.

The sentiment is from Simon Says Stamp Some Bunny stamp set.

I glued everything down and that completed my card.

Thanks so much for stopping by!

Have a great week!

Patty

.

Easter Tags using Waffle Flower Products!

I have at least 6 little coming to my house for Easter so I wanted to make each of them a tag for their basket. I wanted a larger tag so they can easily see their name printed on the tags and find their baskets quickly for the egg hunt.

YouTube video here: https://youtu.be/ncGsc-tlGJ0

Egg Tags!

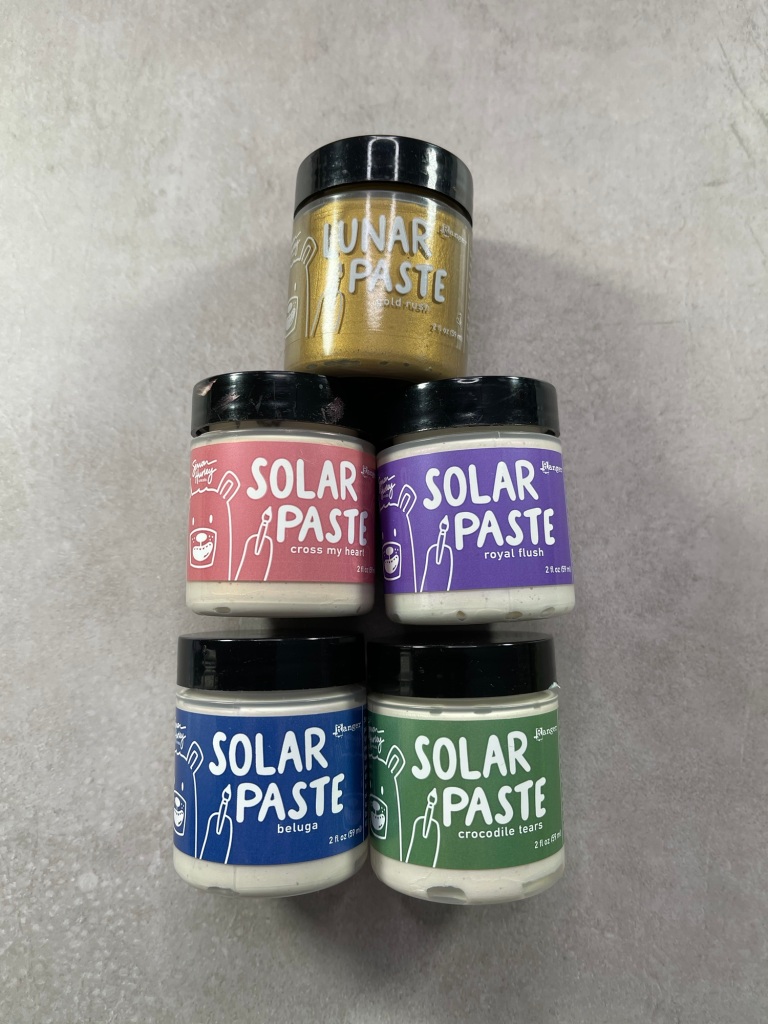
To start, I pulled some colored card stock and some ink for blending and some Solar Paste from Simon Hurley. I used Concord and 9th’s Aqua Sky and Peacock for these tags and Simon Hurley white card stock for the other eggs.

The Waffle Flower Products are the Spring Egg Coloring Duo stencils, Spring Egg die and Lacy Ovals Die set.

I found the stencil set so easy to use. It’s pretty obvious how to line them up once you put the initial layer down. I did use Simon Hurley’s Solar Paste on the Peacock card. When you put the first layer down and let it dry, It worked great. The next layer, due to the dimension created by the first layer, was a little harder to stencil cleanly. Each layer was a little harder because you couldn’t get the stencil to lay flat. I am showing the finished product anyway, because it isn’t horrible and it is important to share the good and the bad.

For the white eggs. I used the die first because it creates dimension. It doesn’t completely cut out all of the images, it embosses all of them and cuts parts of each image. This way you are able to bend the flowers up and the eggs to add even more dimension without adding bulk. It’s a really great die!

Once I finished with the ink blending, I cut the eggs out using the outline die included in the Spring Egg Die set. Then I cut the back out using Simon Says Stamps Color Blend card stock and Waffle Flowers Lacy Oval die set. The card stock has beautiful blending and a nice gloss to it.

I did a tag out of Bazzil Kraft card stock and used Simon Hurley’s Solar Paste on the final layer. Love the gold!

To finish, I used some floss and created the strings and the bows for each tag. It was an easy and fun project and they were done in an evening.

Thanks so much for stopping by! Enjoy your week!

Patty

Nordic Flowers Featuring Poppy Dies

So the snow is almost melted in the Minneapolis area, for now. It is getting to be the time of year where we get snow falls totaling 10 inches or more. But the warm weather has my Iris’ poking through the ground! That really got me inspired to create floral cards.

Today I am using new dies from Poppy Dies. I used two sets, Flower Pots and Stems and the Nordic Flower Heads die sets.

YouTube video here: https://youtu.be/xOoUgyPB3ml

Poppy Dies

To start, I cut out many of the flowers using paper ink blended with Catherine Pooler inks and Recollections foil card stock in Pastel. the colors I used from Catherine Pooler are Whipped Honey, It’s A Boy, It’s A Girl, Lilac, Sage and Mint to Be.

I started gluing all of the different floral pieces together using Bearly Arts Glue. Once I had all of the flowers glued together, I arranged the flowers and leaves on a piece of A2 sized 100lb card stock. After about 20 minutes, I had something I liked and glued all of the floral’s down.

For the sentiment, I used Simon Says Stamps Big Thanks die. I finished off the card with just a few Studio Katia Gold Crystals.

I had a lot of left over flowers and stems so I created two more cards.

For this card, I created the background using Gina K Designs Rose Swirl stencil and some pink paint speckles using Gansai Tambi Gem Pink Paint. The sentiment is from Spellbinders. The gems are from Open Studio Fairy Gemstones.

This card used an old panel. I believe I cut it out using My Favorite Things Blue Print Sketch #27 die. I splattered some gold Gansai Tambi paint and glued the florals down. The sentiment is from Catherine Pooler.

That completes today’s projects. Thanks so much for stopping by!

Patty

Easter Bunnies in Colored Pencil

Hi friends!

Today’s projects are cards I made coloring the adorable bunnies from Simon Hurley’s Easter Bunnies stamp set. It’s something about the nose and the little eyebrows that just makes me love them!

Simon Hurley Easter Bunnies

I started by stamping the images on Bazzil Kraft Cardstock with Hero Arts Unicorn White pigment ink. I colored all of the images using Prisma Color colored pencils.

For the bunnies, I used White, 70% Cool Grey (PC 1065) and 30% Cool Grey (PC 1061). For a video on how I colored the bunnies and created the cards, click this link: https://www.youtube.com/watch?v=gf4Jk_-FR0c&error=0

For the flowers, ribbons, butterflies and eggs, I used Parma Violet (PC 1008), Lilac (PC956) and Lavender (PC 934), for the lavender items. For the pink items, I used Magenta (PC 930), Hot Pink (PC 993) and Blush Pink (PC928). For the teal items, I used Cobalt Turquoise (PC 105), Aquamarine (PC905) and Light Aqua (PC 992). For the greens, I used Prussian Green (PC 109) and Spring Green (PC 912).

For the hills of grass, I cut then using Lawn Fawn Meadow Borders and colored them with the green colored pencils mentioned above. The clouds were made by smearing Hero arts Unicorn White Pigment ink across the card stock. I then took the Honey Needle Stamps Outdoor Scene builder – Clouds and ink blended the clouds in using Catherine Poolers It’s A Girl ink.

I stamped the sentiment using Versafine Black ink and added Pretty Pink Posh Clay Flowers to finish this card.

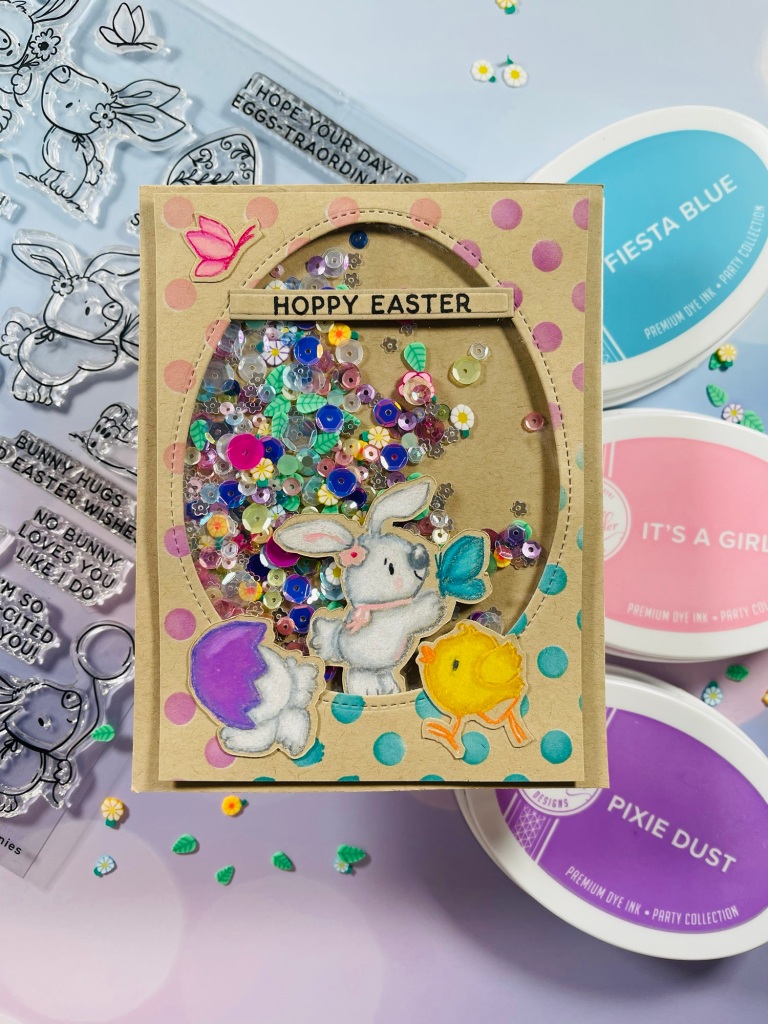
Easter Bunny shaker

For the shaker, I used the second stencil from Simon Hurley’s Polka Dot Assortment and blended Hero Arts Unicorn White Pigment ink over the card panel. I then went over the white dots with Catherine Pooler’s It’s A Girl, Pixie Dust and Fiesta Blue Inks. I cut out the egg shape using Lawn Fawn’s Easter Egg Frames die. I stamped the sentiment using Versafine Ink and cut it out using Simon Says Stamp Nested Banners Die. The shaker materiel is Pretty Pink Posh’s Clay Flowers and Mini Flower Sparkle Sequins along with Catherine Poolers Lisbon, Zanzibar and Sofia sequin mixes.

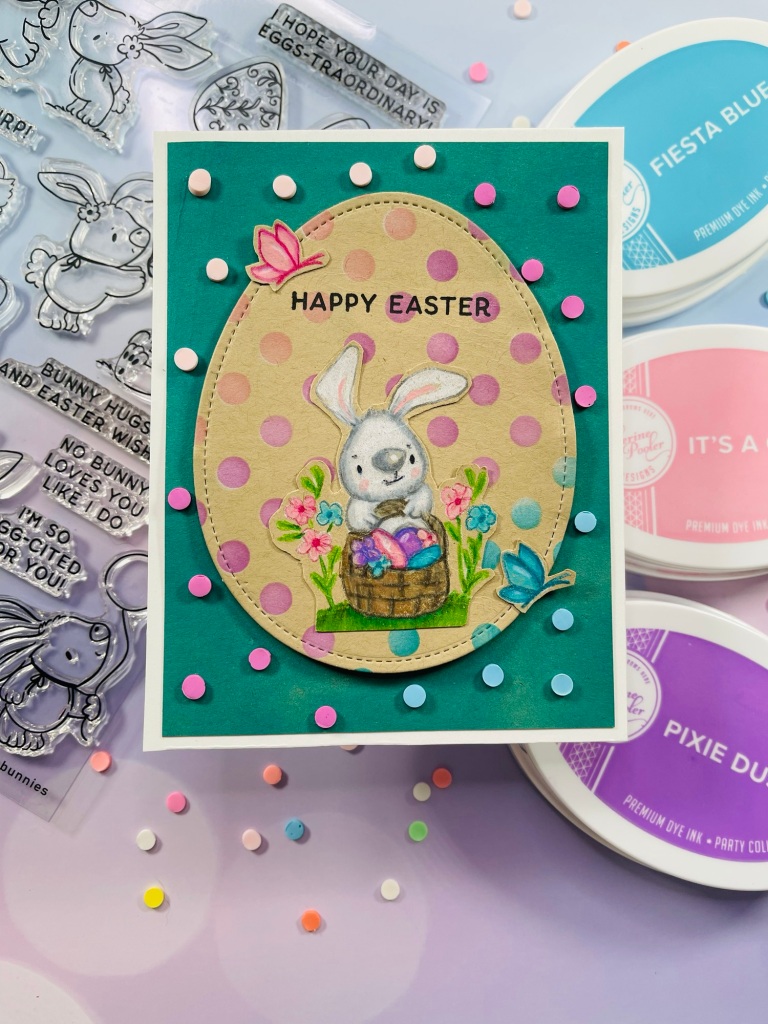
Dotted Egg Card

Not letting anything go to waste, I used the cut out egg for my final card. I ink blended the kraft card stock background with Fiesta Blue ink from Catherine Pooler. I adhered the egg using 3M foam. The Sentiment is stamped in Versafine ink. The clay dots are called Rainbow Dots from Studio Katia.

Thanks so much for stopping by! Have a great week!

Patty

New to me Alcohol Ink Technique

I was able to create many backgrounds using a new to me alcohol ink technique I saw from Lydia at Understand Blue.

The technique is to use embossing folders on foil cardstock. I used Recollections Foil Pastel cardstock from Michael’s. You cover the foiled card panel with gesso and let it dry. Then you spray the panel with 91% Isopropyl Alcohol and drop the alcohol ink on it. I used a camera lens duster to move the alcohol ink. I know Ranger has a similar product to blow the alcohol ink around as well. When dried, I used rubbing alcohol on a paper towel to remove the alcohol ink from some of the raised area’s so the foil would shine through.

I used both Ranger Alcohol ink and Piñata Alcohol ink. Ranger’s bottle has a smaller tip and the inks are more translucent. The Piñata inks were thicker and a little more opaque. They needed more alcohol blending solution than the Ranger Inks did. The only other difference was the Ranger Inks have a shimmer to them. Both gave a good final product.

The YouTube video for this technique can be found here: https://youtu.be/00mwg0ydrBo.

Concord and 9th Celebrate Die

For this card, I used Sizzix 3D Texture Fades Botanical embossing folder. I used Piñata Passion Purple, Seniorita Magenta and Rangers Intrigue inks and Studio Katina’s Gold Gems to embellish.

To create the Celebrate sentiment, I blended Catherine Poolers Sweet 16, Pixie Dust and Flirty Fuchsia. I splattered some Gansai Tambi Yellow Gold and Amethyst on the blended background and cut out the letters. I attached the letters using foam tape.

With the negative from the dies, I created this card.

Concord and 9th Celebrate
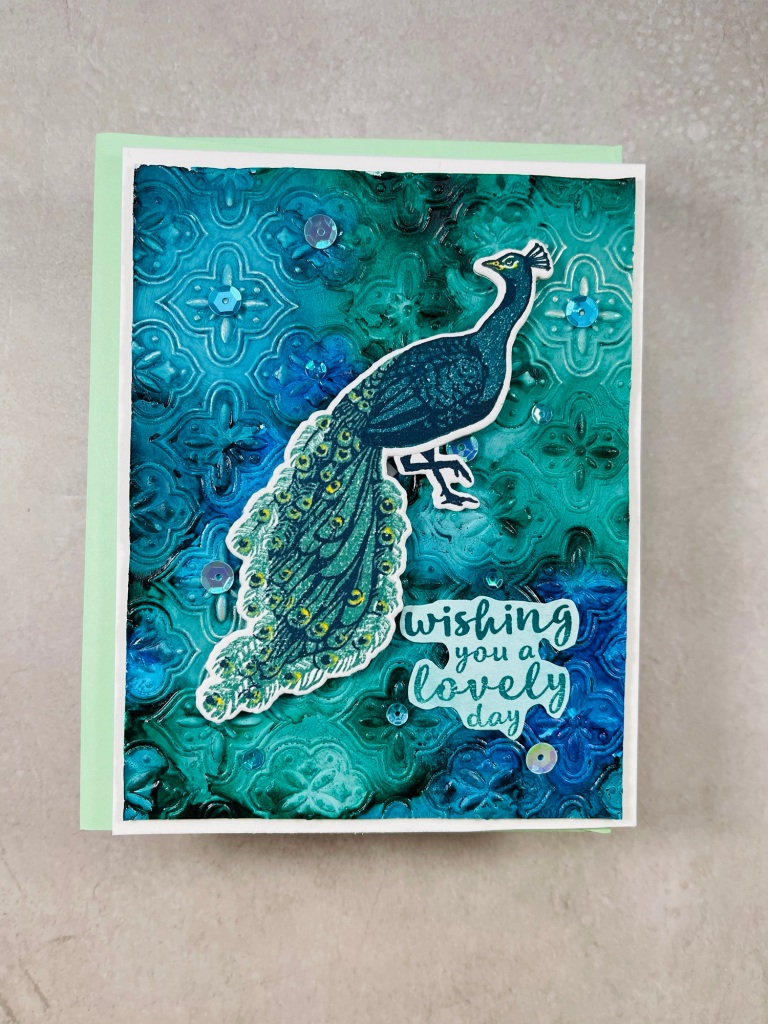
Hero Arts Color Layering Peacock

For this background, I used Spellbinders Tile Reflection background. I used Rangers Tranquil and Piñata’s Baja Blue. The sequins are Hero Arts Ombré Peacock Sequins and the stamp is an older stamp from Hero Arts called Color Layering Peacock.

Waffle Flowers Faith Stamp set

For this card, I used Piñata’s Baja Blue and Ranger’s Sublime and Sunshine yellow. The stamp is from Waffle Flowers Faith set. I ink blended the background of the sentiment’s using Catherine Pooler’s Uptown ink. The enamel dots are from Concord and 9th.

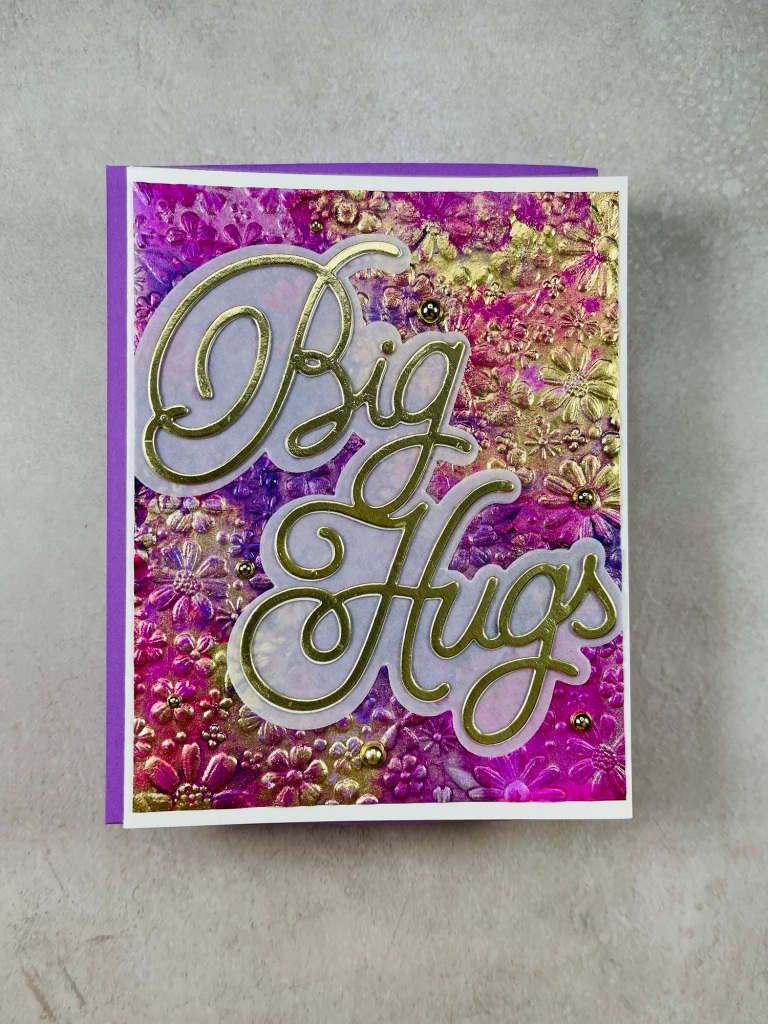
Concord and 9th Big Hugs die

For this card, I used Ranger’s Intrigue and Piñata’s Señorita Magenta, Passion Purple and Rich Gold. The gold embellishments are from Spellbinder’s.

Waffle Flower Thank You

For this card, I used Rangers Sublime, Orange and Sunshine Yellow. I used Waffle Flowers Thank You on Gold Foil Cardstock. You can see some of the gold cardstock on the leaves where I removed the alcohol ink on this card. I used WOW Golden Flame Embossing Powder. Enamel Dots are from Concord and 9th.

Memory Box Co Delicate Butterfly Arch

I used Ranger’s Tranquil and Piñata’s Baja Blue and RainForest Green on this card. The die cut is Memory Boxes’ Delicate Butterfly Arch. The sentiment is from My Favorite Things Hello Beautiful stamp set. The gems are from a company called Open Studio and they are Fairy Gemstones. They are pearlized pastel colored in blues and greens.

Thanks so much for stopping by! Enjoy your week!

Patty